Last update: August 1st, 2017
These instructions are for setting up your robotics workstation in Ubuntu 16.04 (Xenial).
After this, you will have installed the following tools:
For the official documentation, please refer to the website of the corresponding tool.
ROS Kinetic
For up-to-date instructions to install ROS Kinetic, please refer to: http://wiki.ros.org/kinetic/Installation/Ubuntu
sudo sh -c 'echo "deb http://packages.ros.org/ros/ubuntu $(lsb_release -sc) main"      \
> /etc/apt/sources.list.d/ros-latest.list'
sudo apt-key adv --keyserver hkp://ha.pool.sks-keyservers.net:80 --recv-key 0xB01FA116
sudo apt-get update
sudo apt-get install ros-kinetic-ros-base
Initialize rosdep
Before you can use ROS, you will need to initialize rosdep. rosdep enables you to easily install system dependencies for source you want to compile and is required to run some core components in ROS.
sudo rosdep init
rosdep update
Create a ROS Workspace
Let’s create a catkin workspace:
source /opt/ros/kinetic/setup.bash
mkdir -p ~/catkin_ws/src
cd ~/catkin_ws/src
catkin_init_workspace
Even though the workspace is empty (there are no packages in the src folder, just a single CMakeLists.txt link) you can still build the workspace:
cd ~/catkin_ws/
catkin_make
Before continuing, source your new setup.bash file:
source ~/catkin_ws/devel/setup.bashTo make sure your workspace is properly overlayed by the setup script, make sure ROS_PACKAGE_PATH environment variable includes the directory you’re in:
echo $ROS_PACKAGE_PATHThis is the expected output:
/home/username/catkin_ws/src:/opt/ros/kinetic/share:/opt/ros/kinetic/stacks
OpenRAVE
At this point OpenRAVE has a considerable number of dependencies that have to be installed manually. For the sake of simplicity, this instructions will show you how to get working OpenRAVE 0.9.0 with enought features.
Dependencies
You need to install the following programs:
sudo apt-get install build-essential cmake doxygen g++ git ipython octave python-dev  \
python-h5py python-numpy python-pip python-scipy python-sympy qt5-default minizip
Next, you will need to install the following libraries, which are available from the Ubuntu package repositories:
sudo apt-get install ann-tools cmake libann-dev libassimp-dev libavcodec-dev          \
libavformat-dev libboost-python-dev libboost-all-dev libccd-dev                       \
libcollada-dom2.4-dp-dev libeigen3-dev libflann-dev liblapack-dev liblog4cxx-dev      \
libminizip-dev liboctave-dev libode-dev libpcre3-dev libqhull-dev libsoqt-dev-common  \
libsoqt4-dev libswscale-dev libtinyxml-dev libxml2-dev octomap-tools
OpenSceneGraph
The version available at the Ubuntu repositories is 3.2, but OpenRAVE requires 3.4, so we have to build it from source:
cd ~/git
git clone https://github.com/openscenegraph/OpenSceneGraph.git --branch OpenSceneGraph-3.4
cd OpenSceneGraph
mkdir build; cd build
cmake .. -DDESIRED_QT_VERSION=4
make -j `nproc`
sudo make install
FCL - The Flexible Collision Library
Build and install fcl version 0.5.0:
cd ~/git
git clone https://github.com/flexible-collision-library/fcl
cd fcl; git checkout 0.5.0
mkdir build; cd build
cmake ..
make -j `nproc`
sudo make install
sympy Version
Downgrade sympy so that IKFast works properly:
pip install --upgrade --user sympy==0.7.1Build and Install
Now you can build and install OpenRAVE (Tested with commit 9350ebc):
cd ~/git
git clone https://github.com/rdiankov/openrave.git --branch master
cd openrave; git reset --hard 9350ebc
mkdir build; cd build
cmake -DODE_USE_MULTITHREAD=ON -DOSG_DIR=/usr/local/lib64/ ..
make -j `nproc`
sudo make install
Testing the Installation
You can check that your installation works by running one of the default examples:
openrave.py --example graspplanningIt should start the graspplanning example:
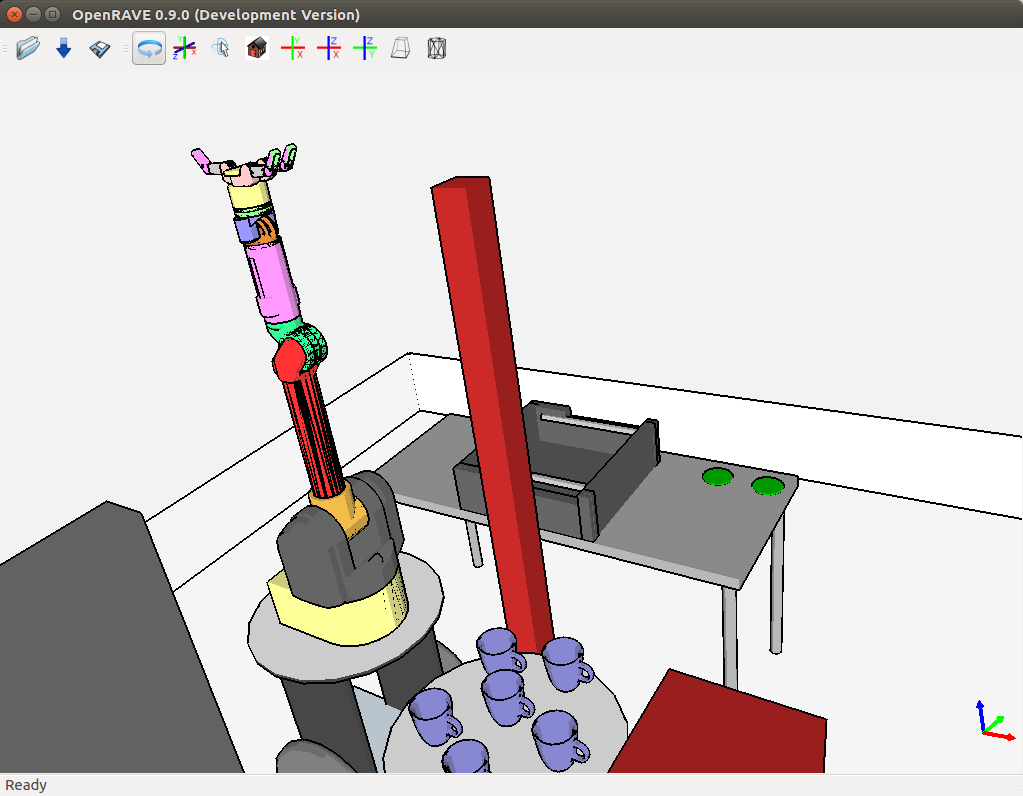
You may see some messages printed in yellow on your terminal but they are just warnings that won’t prevent your installation from working.